


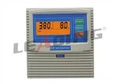
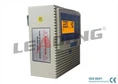


Hey there! As a supplier in the pump control industry, I'm super stoked to share with you how to install a pump control actuator. It might seem a bit daunting at first, but with the right steps and a bit of know - how, you'll have it up and running in no time.
What is a Pump Control Actuator?
Before we jump into the installation process, let's quickly go over what a pump control actuator is. In simple terms, it's a device that helps control the operation of a pump. It can regulate things like the flow rate, pressure, and even turn the pump on and off at the right times. This is super important for making sure your pump works efficiently and lasts a long time.
Tools and Materials You'll Need
First things first, gather all the tools and materials you'll need for the installation. Here's a quick list:
- A set of wrenches (both adjustable and fixed sizes)
- Screwdrivers (flat - head and Phillips)
- Electrical tape
- Wire strippers
- A multimeter (to check electrical connections)
- Of course, the pump control actuator itself
- And don't forget the mounting hardware like bolts and nuts
Step 1: Preparation
The first step in any installation is preparation. Start by turning off the power supply to the pump. This is crucial for your safety. You don't want to be working on electrical components while the power is on. Use a multimeter to double - check that there's no power running to the pump.
Next, find a suitable location to mount the pump control actuator. It should be close to the pump but in a dry and well - ventilated area. Avoid places where it could get splashed with water or exposed to extreme temperatures.
Step 2: Mounting the Actuator
Once you've found the right spot, it's time to mount the actuator. Use the mounting hardware that came with the actuator. Make sure it's securely attached to the wall or the mounting surface. You don't want it to come loose during operation.
If you're mounting it on a metal surface, you might want to use some insulating material to prevent electrical shorts. Just place the insulating material between the actuator and the mounting surface before tightening the bolts.
Step 3: Connecting the Wires
Now, let's get to the electrical connections. This is where things can get a bit tricky, but don't worry, I'll guide you through it.
First, identify the power wires. Usually, there will be a live wire, a neutral wire, and a ground wire. Use your wire strippers to remove a small section of the insulation from the ends of the wires.
Connect the power wires to the corresponding terminals on the pump control actuator. Make sure the connections are tight. You can use a wrench to tighten the terminal screws if needed.
Next, connect the wires from the pump to the actuator. These wires will control the operation of the pump. Again, match the wires to the correct terminals on the actuator.
Once all the connections are made, wrap the exposed wire ends with electrical tape. This will prevent any short - circuits and keep the connections safe.
Step 4: Testing the Installation
After you've made all the connections, it's time to test the installation. But before you turn on the power, double - check all the connections one more time. Make sure everything is tight and there are no loose wires.
Now, turn on the power supply to the pump. The pump control actuator should start working. You can check the operation of the pump by observing its flow rate and pressure. If everything is working correctly, the pump should turn on and off at the right times according to the settings on the actuator.
If you notice any problems, like the pump not starting or strange noises, turn off the power immediately and check the connections again. It could be a loose wire or a mis - connected terminal.
Step 5: Fine - Tuning
Once the pump is running smoothly, you might want to fine - tune the settings on the pump control actuator. This will depend on your specific needs. For example, you might want to adjust the pressure settings to get the right flow rate for your application.
Most pump control actuators have adjustable settings. You can use the control knobs or buttons on the actuator to make these adjustments. Just follow the instructions in the user manual that came with the actuator.
Additional Tips
- Always follow the manufacturer's instructions. Every pump control actuator is a bit different, so make sure you read the manual carefully.
- If you're not confident in your electrical skills, it's a good idea to hire a professional electrician. Electrical work can be dangerous, and it's better to be safe than sorry.
- Keep a record of the installation process. This can be helpful if you ever need to troubleshoot or make changes in the future.
Related Products
If you're interested in other pump control products, we also offer some great options. Check out our 3 Phase Well Pump Control Box and 3 Phase Submersible Pump Control Panel Automatic Water Pump Motor Controller. These products are designed to work seamlessly with your pump control actuator and can enhance the performance of your pump system.
Contact for Purchase and洽谈
If you're looking to purchase a pump control actuator or any of our other products, we'd love to hear from you. Whether you have questions about installation, product features, or pricing, feel free to reach out. We're here to help you find the best pump control solutions for your needs.


References
- Pump Control Actuator User Manuals
- Electrical Installation Guides
- Industry Standards for Pump Control Systems