




Hey there! As a supplier of Duplex Pump Controllers, I've seen my fair share of faulty components in these nifty devices. Replacing a faulty component in a Duplex Pump Controller might seem like a daunting task, but with the right know - how, it can be a breeze. In this blog, I'll walk you through the process step by step.
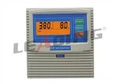
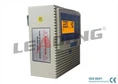
First things first, let's understand what a Duplex Pump Controller is. It's a device that manages two pumps in a system, usually used for tasks like sewage lifting, drainage, and more. We offer some great models, like the Three Phase Sewage Water Pump Controller Specialized in Sewage Lifting and the Three Phase Duplex Pump Controller for Drainage Pump, which are designed to handle different pumping needs efficiently.
Step 1: Safety First
Before you even think about taking apart the controller, safety is your top priority. These controllers are electrical devices, and working with them without proper precautions can be extremely dangerous. So, start by turning off the power supply to the pump controller. This might seem obvious, but you'd be surprised how many people forget this crucial step. You can usually find the power switch near the controller or at the main electrical panel.
Once the power is off, use a voltage tester to double - check that there's no electrical current flowing. This extra step can save you from getting a nasty shock. Also, wear appropriate safety gear like insulated gloves and safety glasses.
Step 2: Identify the Faulty Component
Now that you're safe, it's time to figure out which component is causing the problem. There are a few signs that can give you a clue. If the pumps aren't starting or stopping correctly, it could be an issue with the control relay. If you're getting inconsistent pressure readings, the pressure sensor might be to blame.
Inspect the controller visually. Look for any signs of physical damage like burnt spots, loose wires, or cracked components. Sometimes, a quick visual inspection can reveal the culprit right away. If you're still not sure, you might need to use a multimeter to test the electrical components. For example, you can test the resistance of a resistor or the continuity of a switch.
Step 3: Gather the Right Tools
Once you've identified the faulty component, you'll need the right tools to remove and replace it. Basic tools like a screwdriver set (both flat - head and Phillips), pliers, and a wire stripper are usually all you need. Make sure your tools are in good condition and the right size for the job. Using the wrong tool can damage the component or the controller itself.
Step 4: Remove the Faulty Component
Before you start removing the component, take a picture of the wiring setup. This will come in handy when you're putting everything back together. Then, carefully loosen the screws or clips that are holding the component in place. Some components might be soldered onto the circuit board. If that's the case, you'll need a soldering iron to melt the solder and remove the component.
When you're removing the component, be gentle. Don't pull on the wires too hard, as this can damage the wiring or other nearby components. Once the component is free, set it aside in a safe place.
Step 5: Install the New Component
Now it's time to install the new component. Make sure it's the right one for your controller. You can usually find the part number on the old component and order a replacement from the manufacturer or a reputable supplier.
If the new component needs to be soldered, clean the soldering points on the circuit board first. Then, position the new component in place and solder it carefully. Make sure the connections are strong and there are no loose wires.
If the component is held in place with screws or clips, tighten them securely. But don't over - tighten, as this can damage the component or the controller housing.


Step 6: Reconnect the Wiring
Refer to the picture you took earlier to reconnect the wiring. Double - check that each wire is connected to the correct terminal. Use the wire stripper to expose a small section of wire if needed, and then use pliers to secure the wire to the terminal. Make sure all the connections are tight and there are no loose strands of wire.
Step 7: Test the Controller
Once you've replaced the component and reconnected the wiring, it's time to test the controller. Turn on the power supply and see if the pumps are working correctly. Check the pressure readings, the start and stop functions, and any other features of the controller. If everything is working as it should, congratulations! You've successfully replaced the faulty component.
If there are still problems, don't panic. Go back and double - check your work. Make sure all the connections are correct and the new component is installed properly. You might also want to consult the controller's manual or contact the manufacturer for further assistance.
Step 8: Maintenance Tips
To prevent future component failures, it's important to perform regular maintenance on your Duplex Pump Controller. Keep the controller clean and free of dust and debris. Check the wiring connections periodically to make sure they're tight. And if you notice any signs of wear or damage, address them right away.
We also offer a Construction Site Duplex Pump Controller for Drainage that's built to withstand the tough conditions of a construction site. These controllers are designed for durability and reliability, but they still need proper maintenance to keep them running smoothly.
Conclusion
Replacing a faulty component in a Duplex Pump Controller isn't as hard as it might seem. By following these steps and taking the necessary precautions, you can save time and money by doing it yourself. If you're ever in doubt or need help, don't hesitate to reach out. As a supplier of Duplex Pump Controllers, we're here to support you. Whether you need advice on component replacement, want to order a new controller, or have any other questions, we're just a message away. Contact us to discuss your specific needs and let's find the best solution for your pumping system.
References
- Manufacturer's manual for Duplex Pump Controllers
- Electrical safety guidelines for working with pump controllers