


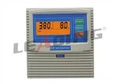
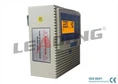


Replacing the components of a pump control panel is a task that requires careful planning, technical knowledge, and adherence to safety protocols. As a pump control panel supplier, I have witnessed firsthand the importance of proper component replacement to ensure the efficient and reliable operation of pumping systems. In this blog post, I will guide you through the process of replacing the components of a pump control panel, from understanding the basics to executing the replacement safely and effectively.
Understanding the Pump Control Panel
Before you begin replacing any components, it is essential to have a thorough understanding of the pump control panel. A pump control panel is an electrical device that manages the operation of a pump. It includes various components such as circuit breakers, contactors, relays, switches, and indicators, all working together to control the pump's start, stop, and speed.
The control panel is designed to protect the pump from overloading, overheating, and other electrical faults. It also provides a user interface for operators to monitor and control the pump's operation. Different types of pumps, such as centrifugal pumps, submersible pumps, and positive displacement pumps, may require different control panel configurations.
Identifying the Components to Replace
The first step in replacing the components of a pump control panel is to identify the faulty or worn - out components. This can be done through regular maintenance checks, troubleshooting, or in response to a pump malfunction. Here are some common signs that a component may need to be replaced:
- Visible damage: Look for signs of physical damage, such as burnt marks, cracks, or corrosion on the components.
- Electrical faults: If the pump is not starting, stopping, or operating correctly, it could be due to a faulty electrical component. Check for tripped circuit breakers, blown fuses, or abnormal electrical readings.
- Age and wear: Components have a limited lifespan. If a component has been in use for a long time, it may be prone to failure and should be replaced as a preventive measure.
Gathering the Necessary Tools and Materials
Once you have identified the components to replace, you need to gather the necessary tools and materials. Here is a list of tools and materials that you may need:
- Tools: Screwdrivers (flat - head and Phillips), pliers, wire strippers, crimping tools, multimeter, and a voltage tester.
- Materials: Replacement components (circuit breakers, contactors, relays, switches, etc.), electrical wire, wire connectors, and electrical tape.
Make sure that the replacement components are compatible with the existing control panel and the pump system. Check the specifications of the original components and match them with the replacement parts.
Safety Precautions
Safety is of utmost importance when working with electrical systems. Before you start replacing any components, follow these safety precautions:
- Turn off the power: Locate the main power switch or circuit breaker for the pump control panel and turn it off. This will prevent electric shock and damage to the components.
- Lockout - tagout: Use a lockout - tagout device to secure the power switch or circuit breaker in the off position. This will prevent anyone from accidentally turning the power back on while you are working.
- Wear personal protective equipment (PPE): Wear insulated gloves, safety glasses, and appropriate clothing to protect yourself from electrical hazards.
- Test for voltage: Use a voltage tester to confirm that there is no voltage present in the control panel before you start working on it.
Removing the Old Components
After taking the necessary safety precautions, you can start removing the old components. Here are the general steps:
- Disconnect the wires: Carefully disconnect the wires from the component that you are replacing. Take note of the wire connections, either by labeling them or taking a picture.
- Remove the mounting screws: Use a screwdriver to remove the mounting screws that hold the component in place.
- Take out the component: Gently remove the component from the control panel.
Installing the New Components
Once the old component has been removed, you can install the new one. Follow these steps:
- Position the new component: Place the new component in the same position as the old one and secure it with the mounting screws.
- Connect the wires: Connect the wires to the new component according to the labels or the picture you took earlier. Make sure that the connections are tight and secure.
- Check the connections: Use a multimeter to check the electrical connections and ensure that there are no short circuits or open circuits.
Testing the Control Panel
After installing the new components, it is important to test the control panel to ensure that it is working correctly. Here are the steps for testing:
- Turn on the power: Carefully turn on the main power switch or circuit breaker for the pump control panel.
- Check the indicators: Observe the indicators on the control panel to see if they are functioning properly. Check for any error messages or abnormal readings.
- Start the pump: Use the control switches to start the pump and monitor its operation. Check for any unusual noises, vibrations, or performance issues.
- Perform a load test: If possible, perform a load test on the pump to ensure that it can handle the required workload.
Maintenance and Follow - up
After replacing the components and testing the control panel, it is important to establish a regular maintenance schedule. Regular maintenance will help prevent future component failures and ensure the long - term reliability of the pump control panel. Here are some maintenance tips:
- Inspect the components regularly: Check the components for signs of wear, damage, or corrosion on a regular basis.
- Clean the control panel: Keep the control panel clean and free of dust, dirt, and debris. This will help prevent electrical faults and improve the performance of the components.
- Calibrate the sensors and controls: If the control panel includes sensors and controls, calibrate them regularly to ensure accurate operation.
Conclusion
Replacing the components of a pump control panel is a complex but manageable task. By following the steps outlined in this blog post, you can ensure that the replacement process is carried out safely and effectively. As a pump control panel supplier, I am committed to providing high - quality components and technical support to help you maintain the optimal performance of your pumping systems.
If you are in need of pump control panel components or have any questions about the replacement process, I encourage you to reach out to us. We have a team of experts who can assist you in selecting the right components and providing guidance on installation and maintenance. Contact us today to start a discussion about your specific requirements and how we can help you keep your pumps running smoothly.
References
- Electrical Installation Handbook, Schneider Electric
- Pump Handbook, Karassik et al.
- National Electrical Code (NEC)